
Recipes to Welcome Spring
Signs of spring are everywhere. Flowers are in bloom, orchards are budding, and new baby goat kids, lambs, chicks and other babies are hopping and chirping all over the farm. As a result, you may also have lots of additional eggs and milk and are thinking of delicious ways of enjoying them with your family and friends.
Below are some of our favorites recipes to give you some ideas for your next spring brunch. Happy cooking and bon appetit!
How to Grow Lavender
Lavender (Lavandula) is such a romantic flower that every gardener sooner or later succumbs to the urge to grow it. It makes an excellent companion plant for almost anything from roses to cabbage. It is one of those aromatic, gray herbs that deer avoid making it a great choice as a decoy in your Hosta or daylily beds. Lavender also attracts pollinators and other insects that are beneficial for your garden.
Lavender is a wonderful, fragrant flowers that keep their fragrance when dried and offer with many uses. Besides being beautiful and aromatic, lavender flowers are also edible. They can be used raw in salads, added to soups and stews, used as a seasoning, baked into cookies, made into oil and brewed into tea. You can use lavender to make potpourri, sachets and much more. Undeterred by the fact that it is a native of the Mediterranean and a lover of dry, sunny, rocky habitats, we give it a try anyway, hoping it will adapt. After all, England can hardly be considered dry or particularly sunny, yet English gardeners are renowned for growing lavender plants. Think of ‘Hidcote’ and ‘Munstead’, two of the hardiest and best loved lavender varieties. There are many varieties of lavender; so look for the variety best suited to your area:
Growing requirements: As with most plants, your success in growing this coveted plant will depend both on what kind of growing conditions you can provide and which varieties you select to grow. Lavender plants will tolerate many growing conditions, but they thrive in warm, well-drained soil and full sun. Add organic matter to improve heavy soils. Do not be fooled, even though lavender is a Mediterranean plant, without the right species, it will die in places like Texas which experience extended high heat and humidity without the cool nights many varieties of lavender require. It is dampness, more than cold, that is responsible for killing lavender plants. Dampness can come in the form of wet roots during the winter months or high humidity in the summer. If humidity is a problem, make sure you have plenty of space between your plants for air flow and always plant in a sunny location. Soil Requirements Like many plants grown for their essential oils, a lean soil will encourage a higher concentration of oils. An alkaline, or especially chalky soil, whill enhance lavenders’ fragrance. Soil should be sandy, loamy, or gravelly. If you live in an area with pour drainage, planting in a raised container with good drainage is a must. Soil should have low fertility. Lavender prefers alkaline soil with a pH of 6.5 or higher. This can be easily measured with a soil test. Add lime to your soil to boost and retain and increase pH level. Areas where the ground routinely freezes and thaws throughout the winter will benefit from a layer of mulch applied after the ground initially freezes. Also protect your lavender plants from harsh winter winds. Planting next to a stone or brick wall will provide additional heat and protection. Soil Preparation Create an12-18 inch mound with well cultivates soil and two heaving shovelfuls of 1 inch stone worked into the mound. Using a trowel, dig a hole that is deep enough for the plant. Blend together a mix or organic matter that will add nutrients to your soil. You can blend together equal parts of bone meal, lime, and well composted manure. Add 1/2 cup in the bottom of the hole and mix together well. The stone will allow the soil to drain, the lime will improve the pH, and the bone meal and compost will make for a healthy start. Lavender prefers arid conditions both beneath and above the soil. If you live in a humid climate, your plant will benefit from light colored, reflective mulch, or very small bits of pebbles and/or gravel. Watering Water lavender deeply but infrequently, waiting until the soil is almost dry. Be on the lookout for wet soil. If you have a mild, but wet winter, check your lavender plants to make sure the tops are not holding excess water, which can cause the crowns to rot. You never want your lavender to be sitting in wet soil, which will rot the roots. Make sure it is growing in a well-draining site to begin with. Growing Lavender in Containers You can always grow your lavender in portable containers or pots and move it to follow the sun or even bring it indoors for the winter. Although lavender has a large, spreading root system, it prefers growing in a tight space. In addition, lavender is shallow rooted, meaning the pot does not need to be very large. Be sure to know the mature diameter of the lavender you are planting so that you can choose an appropriate container. The average depth and spread of the root system is 8-10 inches. A pot that can accommodate the root ball with a couple of inches to spare would be a good choice. Too large a pot will only encourage excessive dampness. Be sure that there is enough drainage for your potted lavender. Root rot is one of the few problems experienced by lavender plants. Remember:
Pruning: Lavender plants need 3 years to hit maturity. They will grow healthier, bloom more profusely and live longer if you do a little annual pruning. Don’t be afraid of this tough love. Lavender plants left to their own devices will become woody and flowering will diminish. Start your plants off right. Although lavender plants get regularly pruned simply by harvesting the flowers, to keep them well shaped and to encourage new growth, a bit of spring pruning is in order. The taller varieties can be cut back by approximately one-third their height. If you have low-growing varieties, trim back foliage 1 to 2 inches. Once your plant is in its second year and if it is 3 to 4 feet tall, you should trim it back to about a third of its height to keep the plant from getting overly woody. If you plant has become woody, remove a few of its older branches and trim back more as new growth begins. When to Prune: In frost free areas, your lavender plants may remain evergreen. You can prune at harvesting time and prune to shape in early spring. If you live in an area where lavender suffers some winter die-back, don't even think about pruning your plants until you see some new green growth at the base of the plant. The top growth will serve as insulation, keeping the crown, and roots of the plant protected from repeated freezing and thawing. However, don’t wait too long either. You should see the new growth by mid-spring. If you wait longer, you risk cutting of the flower buds that are forming. If you disturb the plants too soon in the season, they give up trying. There will probably be some winter die back, but if you wait until the new growth starts, you will be able to see which stems are dead and can be pruned out. If you get a second flush of blooms in the fall, you can cut them back. This will remove some of the top growth, but you don’t all these flower stalks weighing the plants down. First Year Pruning The important thing to remember about first year plants is not to prune down into the woody part of the stems. If you prune too drastically, they might not regrow. Look for where the woody section turns to soft green growth and then prune about 2 - 3 inches above that. It can seem severe, but pruning off all that top growth strengthens the roots and gives you a bushier, more compact plant. Second Year Pruning Your plant should be quite a bit larger this year, with more blooms. While the plant is in bloom, usually in mid-summer, gather up the flower stalks and once again prune the plant back to 2 - 3 inches above where the soft, green growth begins on the lower part of the plant. Don’t shear straight across. Follow the contours of the plant. You should wind up with a rounded mound. Don’t forget to clean up the sides, too. Third Year Pruning By year 3, your plant should be quite large and blooming with abandon. The best time to prune is just as the flowers are starting to open. The flowers will continue to open after you harvest them and you will be able to enjoy both their beauty and their fragrance in bouquets or however you plant to make use of them. By creating a mounded shape in years 1 and 2, the plant is so full by year 3 that using your pruners is not the most efficient way to prune any longer. A small scythe or curved harvesting knife is a much better tool for this. Grab the flower stalks by the handful and slice them off at the base. Don’t try to do the whole plant at once, just grab what you can hold. Harvesting: Gather a long-stemmed variety of lavender if you can, or otherwise remove the excess leaves from each stem. It is best to pick your lavender before it is in full bloom, i.e. before the little florets are completely open and the blooms are showing color. For sachets and potpourri by cutting flower spikes or stripping flowers from stems just as the blossoms begin to show color. This ensures that the dried buds will retain their fragrance for longer, and it also means that they won’t fall apart as they dry. As with most herbs, the best time to pick is in the mid-morning after the dew has evaporated. Buds and Petals: If you want only dry lavender buds or petals and have limited hanging space, remove the lavender stalks from the fresh lavender, keeping the lavender heads. Place your lavender heads in a layer at the bottom of a box lined with newspaper. Store this box in a warm, dry place, and gently shake each day to aerate. Once dried, rub the lavender heads to separate off the individual buds. Bunches: If you would like to dry lavender bunches, make sure you cut nice long stems of lavender. You can hang each stem individually to dry (time-consuming!), or gather together small bunches (so that your hand can wrap around the base of the bunch). Secure the stems of lavender together with a rubber band, because the lavender will shrink as it dries. Once dried, you can replace the rubber band with a decorative ribbon or piece of raffia. Hang your bunch of lavender upside-down to dry in a well ventilated area of your house (in your garage, from a curtain rail, etc). You can also place a blanket, sheet, tray or paper under the lavender to catch any of the petals that might fall off during the drying process (these are good to use for making lavender sachets!). Remember, humidity is your enemy. Drying times The lavender drying time will depend upon the level of humidity and temperature, so check on your bundles periodically to assess their dryness. It can be anywhere from 1 week upwards (usually taking between 2-4 weeks). Check that the buds and stalks are completely dry (they should feel dry and a bit brittle or crunchy to touch) before you use them, otherwise they might grow mold, fungus, or rot.Once dried, remove the rubber band from around the stems, and use the dried lavender to make fragrant flower arrangements. Put your bunch of dried lavender in a vase, or lay on a shelf or table. These bunches will add a beautiful fragrance and look to any room. Alternatively, collect the lavender buds and use them in potpourri and lavender sachets. The remaining lavender stalks can be used as fragrant fire-starters during winter. Longevity: Unfortunately even if you do everything right and your lavender plants appear happy, the genus is generally not long lived and most lavender plants begin to decline after about 10 years. Therefore, plan to refresh your lavenders with new plants on a fairly regular basis. Additionally, there are many other beautiful and beneficial herbs in additional to lavender which can yield great enjoyment
Click to set custom HTML
1. Grow what your family loves
It's important to consider what will grow well in your area, but don't grow a particular produce just because everyone else is, especially if they aren't one of your favorites. Remember that with a successful garden, you'll be reaping an abundant harvest that can be consumed both fresh and preserved for later. Make a list of what your family truly loves to eat and plan your kitchen garden accordingly.
2. Grow for flavor
Grow Crops with long (or repeat) harvest
Certain crops are one-hit wonders, like cabbage or corn, while others keep giving. Tomatoes, beans, peas, okra and peppers will bear for weeks. Carrots, turnips and beets can be harvested over a long time as they mature. Remove the larger ones to allow the smaller ones to mature.
4. Grow vertically
Many vegetables can be grown on tripods or trellises saving a lot of space. In addition, using cages for plants like tomatoes not only helps conserve space, but ensures a better crop through reduce breakage and potentially fruit rotting when touching the ground. Cucumbers, peas and winter squash can be grown on trellises. Pole beans can be more productive than bush beans in the same amount of space and we've even used beans as a summer privacy screen. This also works well with berries such as raspberries.
6. Grow espaliers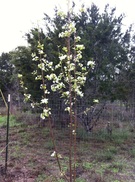 This pear tree is being trained This pear tree is being trained
Espaileriing means training fruit trees on a flat plane, usually against a wall or fence, but they can be free standing as well. This saves a lot of garden space.In addition, by growing the tree flat against a wall or fence, can create a favorable microclimate in which the wall radiated heat and provided shelter. Growers typically keep trees dwarfed for ease of management.
This doesn't affect fruit production as training fruit tree branches to grow horizontally increases fruit production. The technique was developed in the 16th century, out of the practical need for growing fruit in such marginal climates as northern France and southern England. It was discovered that if the branches were bent horizontally, they could direct energy away from vigorous vertical growth and into producing spurs (those lateral branches that eventually flower and produce fruit). Learn more about fruit production here. 7. Use succession planting
Some crops like leaf lettuces will grow quickly and be harvested. Replace them with new plants if the season will still support, or move to the next season's crops, depending upon the weather.
8. Mix edibles with ornamentals
We have been experimenting for a number of years with different ways of preparing the earth for our crops. Historically, tillage was performed to prepare a seedbed and control weeds. In conventional tillage, the earth is turned to a depth of 8 to 12 inches with a plow and then disked twice. No-till farming, on the other hand, is pretty much exactly what it sounds like. The first three steps in conventional cultivation are eliminated and the crop residue is left undisturbed after harvest and the next round of seeds are pushed through it, followed by placing the seeds and closing the trenches or holes. Since 1989, it has become the dominant form of soil management on conventional operations, covering more than 65 percent of cropland. However, no-till planters and herbicides are available to commercially accomplish these tasks and the results have been mixed. In addition, there are large amounts of herbicides that are applied in conjunction with "conventional" no-till. With commitment and experience, no-till can work, but our focus was how to minimize tilling while also minimizing - or altogether eliminating herbicides and pesticides.
Pros and Cons of Each Approach First, let's revisit why it is desirable to move the soil at all. Conventional wisdom was soil is tilled is to loosen it so oxygen and water can reach the area where roots will grow. However, many passes over a field with equipment and even heavy animals such as oxen or horses, much less heavy equipment, further compacts the layer of soil just beneath that of which was tilled. Additionally, the broken-up soil is very prone to being compacted by rainfall. its ability to create a more natural soil that retains nutrients and water, prevents soil erosion, and compacts less. Plowing, it is claimed, incorporates fertilizers and crop residues into the soil, making nutrients readily available to the roots of the plants. Turning organic matter under also has the benefit of preventing planters from becoming fouled with surface trash. In no-till farming, crop residues are left on the surface, where the nutrients that result from their decay can leach into the soil. This leaching process is far more thorough than you might imagine. Fertilizers—including anhydrous ammonia, phosphorus, and potassium—are at least as effective on the no-till fields where they've been dispersed as on the plowed plots. These ingredients can be placed directly into the planting trench, where they're most needed, during seeding. As for the potential problem of the planter fouling with residues, it is recommended to cut a slot through surface trash. Though the soil does stay cooler until a little later in the spring because of the insulating layer of residue, the day/night soil temperature fluctuations are smaller. A no-till field rapidly makes up its deficit in growth rate as the weather turns warm. And if the summer should be really hot and dry, no-till yields will nearly always exceed those of plowed ground. Since soil moisture levels can be more than 10% higher in late July in an unplowed piece of ground, it's not surprising that plants are happier in a field covered with mulch. One of the significant downsides of plowing is it tills the entire area, where doing so by hand will only create the trench needed for seeding. Both plowing and tilling can be done in a way to help minimize the amount or water runoff, but a big benefit is that no-till soils stay more moist than those in tilled fields. The surface residues trap water and protect the earth below from the evaporative effect of the wind. In areas, where adequate spring moisture depends largely on spring rains and/or snowmelt, the vegetative cover helps keep the snow from blowing away and water runoff. (For more on permaculture practice click here). The advantages don't end there, though. If you grimaced when you read "anhydrous ammonia", consider this: One of the main problems with conventional agriculture's heavy use of nitrogen fertilizers is the leaching of these compounds into surface water during runoff. By retaining rainfall, the untilled field also better holds the chemicals that have been applied to it, thereby decreasing their pollution potential. Our Findings in the Backyard Garden When the climate is drier, we strongly prefer a minimal till approach as described on the Building Soil page. This might involve taking a spade and lifting up the soil where the plant will go and perhaps 12 inches of space on all sides. Then as the plant grows, we will hand pick the weeds that grow up around it. This is very desirable and doable during periods of low rain fall because a minimal amount of soil is turned over to release carbon and dust in the to atmosphere, the bacteria and beneficial creatures in the slow are minimally disturbed and the weeds - with some regular diligence, and especially when a drip irrigation system are used - are easily kept under control. However, we've also found that in optimally rainy conditions, no till seemed like a futile attempt to do the right thing for the environment. Weeds quickly out-paced our ability to pull and pests arrived in droves, often taking advantage of the long stems and leaves of the weeds around the crops to hide themselves and gain advantageous access. Our attempt at minimal tillage in a year like this left us breathless, exhausted and with a minimal yield of crops. One of our take-aways was we needed to over-turn more of the soil around the plants and we needed to weed more often. Unfortunately, tiime is not in endless supply, so here are some other things we learned: Looking for a warm and cozy side dish for your meal? Belly-warming braised spinach fits the bill. It complements almost any main dish, including soups. You can make the bacon in advance and save the bacon fat for future use. Spinach is one of the healthiest overall foods. It's full of antioxidants and help to fight off disease and prevent cancer. It also contains Vitamin C and Vitamin E, which help increase a person's energy level and control blood sugar. In addition, spinach contains lots of fiber which aids the colon and prostrate. Maple syrup makes a lovely pairing in this dish and features 54 different antioxidants, such as polyphenols, trace elements and vitamin, positioning the flavorful ingredient among fruits and vegetables well-known for their health benefits. The apples provide additional fiber and vitamins.  Ingredients
4 slices of apple bacon 1 tablespoon of bacon fat 1/8 cup purple onion 2 tablespoons maple syrup 2 large crisp apples (Honey Crisp works well) 4 strips of apple bacon, crumbled into large pieces 4 cups of washed and dried baby spinach Steps 1. Melt bacon fat in a 12" skillet 2. Add onion and sauté until translucent 3. Pour maple syrup into pan and immediately add apples and bacon 4. Mix together just until the syrup coats all ingredients 5. Add spinach and cover for two minutes 6. Remove cover; spinach should be just wilted, but still a bright green. Continue cooking a few seconds more uncovered if needed, but be careful not to overcook. Immediately plate and serve. As the fall season visits us again, my education of mushrooms continues. I'm still not willing to try to forage and consume my own mushrooms without being overseen by an expert, and I'm still learning about how to successfully cultivate my own measures. However, I can recommend an excellent book on the cultivation of mushrooms, Organic Mushroom Farming and Mycoremediation by Tradd Cotter. In addition, working with local experts is extremely helpful. I'll post more information about my mushroom adventures as I feel comfortable with my knowledge level. In the meantime, my love affair with cooking with mushrooms continues and I've been playing around with some different recipes. This one below can use morels, but since they are often difficult to find, especially during periods of drought, I find baby bellas and white button mushrooms will also work well. This recipe easily scales up or down and you can put this recipe over a hearty slice of bread as indicated in the recipe, but I've also used it in over pasta, potatoes, in omelets and spread over a flat bread of pizza dough. I've also occasionally added some green chilies or other spicy pepper at the same time I sauté the garlic. You can also use rehydrated mushrooms, but I find the results are better with fresh mushrooms. It's all good, so feel free to give it a try and be creative. I hope you enjoy it! MUSHROOM MADNESS ON SOURDOUGH BREAD Ingredients:
Procedure: Sauté crushed garlic cloves in the butter for couple of minutes than add the mushrooms and cover. Cook under cover (to preserve liquid) till tender. Season with salt and pepper to taste. Cut bread in 1/4″ slices and lightly toast. Add parsley to the mushrooms and cook for an additional minute. Remove Morels with liquid to a bowl. Serve the mixture on top of the bread - or whatever else you decide. Update: Since posting this recipe, we've also added some new mushroom-based recipes on our Wild Harvests page. Check it out and let us know your favorite. We're so excited about 2015 being the year of the goat and the wonderful things goats offer. Best wishes to you and your family - and flocks and herds!   Happy Valentine's Day from our family to yours and peace to everyone! Our farm family contains a menagerie of animals, but nothing helps make it possible more so than our dogs. For our farm, we currently use two Livestock Guardian Dogs, also known as LGDs, and a herding dog. When we first started our farm, we battled little critters eatting our garden produce and rodents trying to get access to our feed. These were nuisances, but managable to some extent with more fencing, netting and other passive preventative measures. However, as our litte flocks and herds began to grow as a result of our successful breeding programs, another problem introduced itself, larger and more persistent predators that were creating losses that more significantly impacted our financial bottom line. First Came the Guineafowl Some of our largest losses came from predatory birds, with hawks and owls presenting the largest problems, but the occasional eagle would also make an appearance looking for an easy meal. Our free ranging chickens took the first few hits, so we introduced guineafowl to help keep a watch on the skies. The guineas are excellent watchdogs, but they had one problem - the hawks would learn to attack them from in the trees and shadows where the birds didn't see them in time. The first couple of times, my position was, "This is nature and everything needs to eat." However, it soon became apparent that the predatory birds didn't always kill because they needed a meal, but often seemed to be killing for fun or sport. Unfortunately it became somwhat common at times to see the predatory birds attack, snapping off the heads of guineas and then leaving the remainder of the body behind. In addition, it all happens so fast, that even if you are in the field with the birds, there is little you can do.
 Return the Birds to the Coops and Reinforced Fencing Our short term remedy for this was to keep all the birds inside their coops for a couple of weeks to train the predatory birds that the easy meal plan had been terminated, but this made our birds extremely unhappy, so we needed another solution. In addition, it was also nearing the time for our goat does to begin kidding and a newborn baby goat can easily be carried away by a large predatory bird. In addition, coyotes, feral hogs, skunks, foxes and other hungry, larger non-flying predators were also looking to feed themselves and their families. We employed goat panels with two more sets of wire fences with electric wire at the top surronding the kid pens, but if you've ever seen coyotes climb fences, you know this is far from a fool proof solution. Electric tensil wire does work well with predators in the cat family as they are more sensitive to the shock and will respect it. Sitting up all night watching for predatories is not really a viable option for most people and using poisons should be avoided at all costs - not only is it a risk to animals you do want, it's a horrible death and can also negatively impact other wildlife. So, what to do? This is when we decided to give LGDs a try. However, I always prefer to rescue dogs if at all possible, so our first find was an Anatolian Shepard/Pyrenees cross. When we first got her, she was covered in fleas, flea bites and mange. She was courageous, but almost too aggressive for my comfort level, so we began to socialize her. The "experts" will often say with a LGD that you want to work in the field, leave them in the field at all times with the once a year exception of going to the vet. This is so the dogs will bond solely with the flock instead of attacking the livestock. For LGDs that you want to keep as pets, take them with you everywhere and socialize them intensely. After working with the first LGD, I'm a little confused on this point. Perhaps our dogs are unique, but they are superb as pets and with protecting the livestock - typically barking and chasing the predator is enough to prevent any problems, but they will attack if required. I believe that this is likey because centuries of breeding for that purpose are going to instill behaviors that run very deep. One note though is that with working LGDs, it is best to have at least two, if not more. There are many instances where a single LGD has been killed and eatten by a mountain lion and an aggresive pack of coyotes intent on getting to their target can be quite a bit to handle for a single dog. Therefore we started seeking a second rescue. It took a little while to find a fit, but eventually I received an email notifiying me of a rescue needing a home that sounded like it would be a good match for our family.
 One day when selling some of our kids, a lady came to our house and enthusiastically exclaimed, "Oh my goodness, you have a Maremma! Where in the world did you get her?" We had no clue what she was talking about, so we asked a few questions and did some research on the internet and then verified that we did indeed have a Maremma Sheepdog, a breed hailing from central Italy and used for centuries to guard sheep from wolves. She's an incredibly wonderful dog and we feel very lucky that she found her way to us. She's superb with livestock job, loyal and benevolent. She watches over all the animals including the smaller herding dogs as well as cattle and horses. She's fine with heat, snow, wind and rain. Whatever the world hands to her, she's fine with the situation and just grateful to have a home - which she never leaves unless you've asked her to go with you. We couldn't have asked for a better fit. Our Conclusion
The benefits offered by the LGDs were amazing. No more birds or larger livestock were lost again to predators. Even poisonous snakes were addressed, but somehow the benign ones are left alone - I have no clue how they understand the difference. They aren't herders and they aren't extremely active dogs. Mostly they nap or doze, but having an amazing hearing capability that allows them to hear things that other dogs never seem to notice. With the predatory birds, they also watch the skies as well as the ground and are amazing at making sure the birds move on the next easier target. I have some great photos somewhere of the dogs work with the livestock. Once I find them, I'll post a follow-up. Growing OnionsOnions are one of the simplest of all crops to grow and offer amazingly diverse options. You can select from heirloom organic onions, harvest wild onions, or even grow onions from the leftover bottoms that you would normally discard as compost or trash. Onions can be grown from transplants, sets or seeds. Onions grown from seeds are a little tricker, so if you can start with onion bulbs or left over "used" onions, that's likely your best bet. Varieties The size of the onion bulb is dependent upon the number and size of the green leaves or tops at the time of bulb maturity. For each leaf there will be a ring of onion; the larger the leaf, the larger the ring will be. The onion will first form a top and then, depending on the onion variety and length of daylight, start to form the bulb. Onions are characterized by day length; "long-day" onion varieties will quit forming tops and begin to form bulbs when the day length reaches 14 to 16 hours while "short-day" onions will start making bulbs much earlier in the year when there are only 10 to 12 hours of daylight. A general rule of thumb is that "long-day" onions do better in northern states (north of 36th parallel) while "short-day" onions do better in states south of that line. Growing from "left-overs" If you want to be sustainable, trim off the bottom (flatter side) of the onion leaving approximately 1.5 to 2 inches of onion attached to the roots. Allow them to dry in a cool, well-ventilated space for a few hours to a couple of days. What you are looking for is an onion that is dry to the touch and slightly shriveled. If the onion becomes moist, it will rot. Make an indention in your garden soil, place the bowl of the root into the indention and cover with 1-2 inches of soil. Keep the onions evenly moist, but not wet, so they do not rot. Onions needs enough water to grow, but too much is another problem. Be sure to reduce watering prior to your desired harvest date so the onions are harvested in dry soil and therefore do not contain any excess moisture. If you live in an area with a rainy fall season, you'll want to be sure to get your onions out of the ground before the fall rains start. How to Plant Fertilization of onion plants is vital to success. Traditional planting advice says onion growth and yield can be greatly enhanced by banding phosphorus 2-3 inches below the seed at planting time. This phosphorus acts as a starter solution which invigorates the growth of young seedlings (see Preparing the Soil below). Once established, onion plants should receive additional amounts of fertilizer (21-0-0 - Ammonium sulfate or Ammonium nitrate) as a side-dress application every month (see Fertilization and Growing Tips). However, I opt to avoid conventional fertizilers. Instead I clean out my chicken coop a couple of times a year and mix in "the yield" well with my compost pile (you can learn more about composting on our composting page). After the compost is well-cured, I apply it to my garden a couple of months before I intend to plant. I will go out and very gently fold in the compost into the soil between the time of application and planting to ensure the compost is well-integrated with the soil If planted thickly, plants can be pulled and utilized as green onions or scallions for salads or fresh eating in 8-10 weeks. However, most gardeners want to grow an onion bulb as large as possible. To do this, the onion plants must be thinned until they are at least 2-3 inches apart to insure adequate bulb expansion. The removed plants can be used for scallions or for transplanting into another area of the garden so that these too will have adequate space in which to enlarge into large bulbs. Gardeners who tend to procrastinate should be warned that planting when there is the onset of impending frost and/or freezing temperatures could mean failure. Failure in onion production comes in two forms: complete annihilation of the young seedlings during a cold winter; or an abundance of spring onion flowers which decrease bulb size, weight and storage ability. Onion plants which are small and rapidly growing when the cold temperatures of winter arrive will probably not survive. Yet, if you plant earlier and the stem of onion plants are larger than a pencil when exposed to cold temperatures, the onion will initiate and produce a flower during the following spring. This flowering is termed bolting. Bolting requires low temperatures. Most rapid bolting is caused by temperatures of 40-45 degrees F or below. Fall seeded crops are susceptible to bolting the following spring if warm fall temperatures, allowing excessive growth, are followed by low winter temperatures and slowed growth. Many gardeners believe that early removal of the onion flower stalk will cause onion bulb enlargement but this has not proven to be the case. Flowering causes a decrease in bulb size as well as a central flower stalk which enhances decay during storage. This is exactly what will happen to those who are planting onion transplants or sets in October or November with the hope of large onions next spring. The onion bulbs which produce a flower stalk may be large but they will be light-weight (one-half the weight of a comparable size, non-flowered onion bulb) and prone to decay. Care Of Transplant Instructions If you order live plants, they should be planted as soon as possible. Should conditions exist that make you unable to plant these plants right away, remove the onion plants from the box and spread them out in a cool, dry area. The roots and tops may begin to dry out but do not be alarmed, the onion is a member of the lily family and as such will live for approximately three weeks off the bulb. The first thing that the onion will do after planting will be to shoot new roots. Preparing the Soil Onions are best grown on raised beds at least four inches high and 20 inches wide. Banding a fertilizer rich in phosphorous (10-20-10) or a super phosphate (0-20-0) 2 to 3 inches below transplants or seeds at planting time. Banding phosphorus involves making a trench 3 inches deep, distributing one-half cup of super phosphate per 10 row feet and covering the phosphate with soil. If sowing seeds, cover lightly with one-half inch or less of soil. If using transplants, cover the fertilizer with two inches of soil and plant the transplants. Planting Set plants out approximately one inch deep with a four inch spacing. On the raised bed, set two rows on each bed, four inches in from the side of the row. Should you want to harvest some of the onions during the growing season as green onions, you may plant the plants as close as two inches apart. Pull every other one, prior to them beginning to bulb, leaving some for larger onions. Transplants should be set out 4 to 6 weeks prior to the date of the last average spring freeze. Fertilization and Growing Tips Onions require a high source of nitrogen. For organic gardeners a rich compost high in nitrogen should be incorporated into the soil. If you grow onion plants with a low nitrogen supply, the harvest date will be postponed The onions will be smaller, but they will not be as prone to sprouting. Unfortunately, there is not any product available to assist in weed control so the only method will be cultivation. While cultivating be careful not to damage the onion bulb. As the onion begins to bulb the soil around the bulb should be loose so the onion is free to expand. Do not move dirt on top of the onion since this will prevent the onion from forming its natural bulb. Start early with cultivation practices. Once the neck starts feeling soft do not apply any more fertilizer. This should occur approximately 4 weeks prior to harvest. Always water immediately after feeding and maintain moisture during the growing season. The closer to harvest the more water the onion will require. Weed control requires dilgence - handpulling is prefered. Disease and Insect Control The two major diseases that will affect onions are blight and purple blotch. Should the leaves turn pale-green, then yellow, blight has probably affected the plant. Purple blotch causes purple lesions on the leaves. Heavy dew and foggy weather favor their rapid spread, and when prolonged rainy spells occur in warm weather, these diseases can be very destructive. The best cure is prevention: use only well-drained soil, run the rows in the same direction as prevailing wind and avoid windbreaks or other protection. Should conditions persist, a spray with a multipurpose fungicide such as daconil can be applied on a 7 to 10 day schedule. The insect that causes the most damage is the onion thrip. They feed by rasping the surface of the leaves and sucking the juices. They are light-brown in color and are approximately 1mm long. Insecticidal soap or biological insecticide may be used. Do not apply any insecticide within seven days of harvest and always follow label instructions. Flowering -- Abnormal For Onions; Normal For Garlic Flowering of onions can be caused by several things but usually the most prevalent is temperature fluctuation. An onion is classed as a biennial which means it normally takes 2 years to go from seed to seed. Temperature is the controlling or triggering factor in this process. If an onion plant is exposed to alternating cold and warm temperatures resulting in the onion plant going dormant, resuming growth, going dormant and then resuming growth again, the onion bulbs prematurely flower or bolt. The onion is deceived into believing it has completed two growth cycles or years of growth in its biennial life cycle so it finalizes the cycle by blooming. Flowering can be controlled by planting the right variety at the right time. Bulb formation in garlic occurs in response to the lengthening days of spring, and bulbing and maturity are considerably hastened if temperatures are high. In addition to these requirements, the dormant cloves (divisions of the large bulb) or young growing plants must be exposed to cold temperatures between 32 and 50 degrees F. for one or two months in order to initiate bulbing. Plants that are never exposed to temperatures below 65 degrees F. may fail to form bulbs. With fall plantings, the cold treatment is accomplished quite naturally throughout the winter, but a spring planting spells disaster in many zones. What To Do About Flowering? Once the onion plant has bolted, or sent up a flower stalk, there is nothing you can do. The onion bulbs will be edible but smaller. Use these onions as soon as possible because the green flower stalk which emerges through the center of the bulb will make storage almost impossible. Seedstalk formation (bolting) of garlic is not induced by exposure to fluctuating temperatures, as is the case with onions, which means that a wide range of fall planting dates is permissible for this crop. Seedstalk formation is also not damaging to garlic since the cloves are arranged around the seedstalk and will be removed from the dried seedstalk. Conversely, the edible onion bulb is penetrated by the seedstalk which is hard when the bulb is harvested, but prematurely decays causing loss of the entire bulb in storage. When the tops become yellowish and partly dry, garlic is ready for harvest. Harvesting and StorageOnions are fully mature when their tops have fallen over. Onions that are carefully stored will stay fresher and avoid sprouting. It is critical to cure (or dry) onions before storing them. This is a critical step to make sure your onions don't contain excess moisture. They are properly cured when the necks are tight and the outer scales are dried when they rustle. If not properly cured, the onions are likely to decay in the form of gray mold (neck rot) which occurs at the top of the bulb. After pulling from the ground allow the onion to dry, clip the roots and cut the tops back to one inch. The key to preserving onions and to prevent bruising is to keep them cool, dry and separated. After the onions are cured, the ideal storage condition is 33 degrees F, at 65-70% relative humdity. When temperatures and humdity levels get too high, the onions are more inclined to sprout. The humdity factor is what I've historically found to be one of the trickier parts of onion storage. When I was researching onion storage, I came across the following: "If you have the space, onions may be preserved In a refrigerator for as long as one year. Wrap the onions separately in foil." Well, I don't have that much space in a refrigerator and then doesn't seem like a very environmentally friendly way of storing them - using energy and aluminium foil. To me, if you are growing onions, the more practical way of storing onions is in a mesh bag, nylon stocking (can't make it too heavy) or even a well ventilated burlap sack will often work. If you want to try a stocking, place an onion in the bag and tie a knot or put a plastic tie between the onions and continue until the stocking is full. Loop the stocking over a rafter or nail in a cool dry building and when an onion is desired, simply clip off the bottom onion with a pair of scissors or remove the plastic tie. Another suggestion is to spread the onions out on a screen which will allow adequate ventilation, but remember to keep them from touching each other. As a general rule, the sweeter the onion, the higher the water content, and therefore the less shelf life. When I was a kid, the older folks just used to store them well spaced apart in their root cellars - or simply under the raised floors of houses and most of the onions seemed to store pretty well. One other thing to keep in mind is a pungent onion will store longer so eat the sweet varieties first and save the more pungent onions for storage. 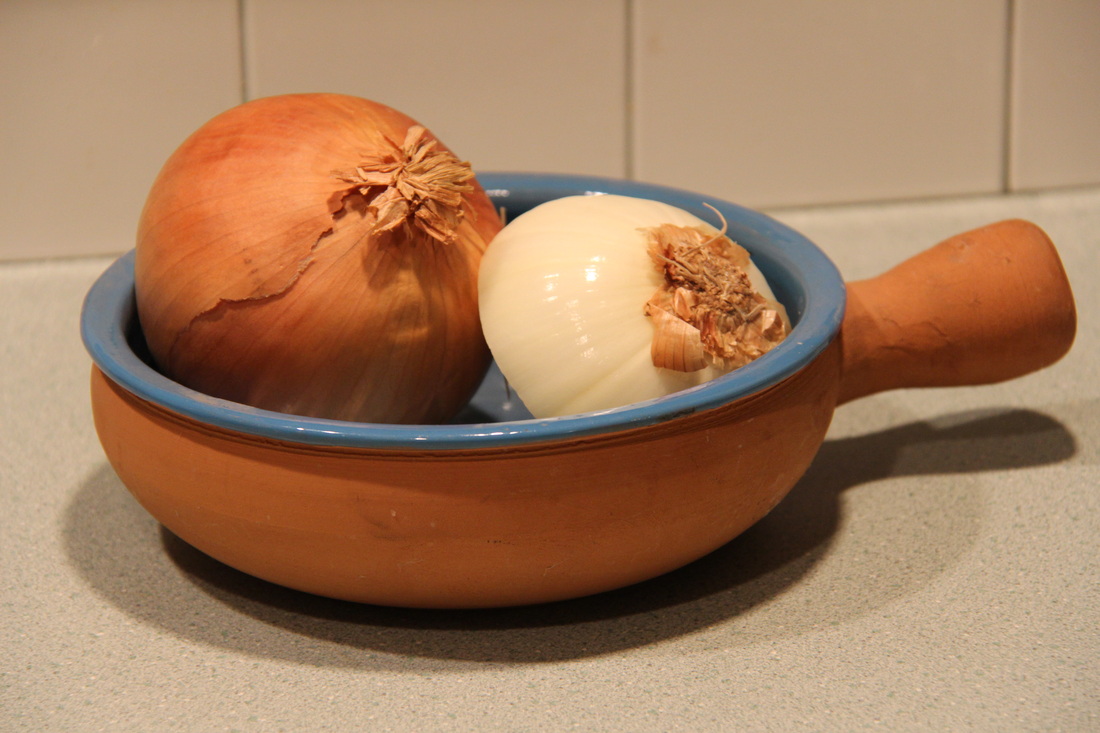 Looking for cooking ideas for onions? Check out some of our favorite recipes on the side dishes recipes at http://www.life-slice.com/side-dishes.html. In staying with the goal of living as sustainably as possible, we decided to delve into discovering more about wild mushroom season and the topic of this entry is the Chanterelle Mushroom. Chanterelle's are growing wild on my property and picking your own is a fun way to get out into the great outdoors and experience the thrill of gathering your own food - and will give you the freshest mushrooms possible! It should be noted that Chantarelle mushrooms have a very strong likeness to the Jack O'Lantern poisonous mushroom, so unless you are a very experienced mushroom gatherer, be sure to find an experienced mushroom forager and go foraging with them. Many areas have a mycological society that you can join. It is much too risky to take chances with foraging without in depth knowledge. Chanterelles seem to be worth their weight in gold. They are golden looking, golden tasting, and golden priced. The cap is fleshy, with wavy, rounded cap margins tapering downward to meet the stem. The gills are not the usual thin straight panels hanging from the lower surface of the cap, as we see in the common store mushroom. Instead, the ridges are rounded, blunt, shallow, and widely spaced. At the edge of the cap they are forked and interconnected. The chanterelle's aroma is variously described as apricot- or peachlike. It is unmistakably different and identifiable.  Chanterelle Mushroom  Chanterelles reappear in the same places annually if carefully harvested. Do not disturb the ground in which the mycelium (the vegetative part of the mushroom) grows. There are yearly variations--some years more mushrooms, some less. They fruit from September to February on the West Coast and almost all summer in the east, sometimes coming up in several flushes. Their mycelial threads are found intertwined with the roots of hardwood trees, conifers, shrubs, and bushes as the mushrooms and hardwoods derive nutrients from one another. Chanterelles enjoy deep, old leaf litter and are seldom invaded by insects. Although I had tried them with all the traditional pasta and fricassee type dishes, I wanted to give something else a go. This recipe fit the bill. SAVORY CHANTERELLE BUDINO AND CHANTERELLE-WALNUT PATE OVER MIXED BABY SALAD GREENS Attrributed to Barabara Lee, as found at http://www.marxfoods.com/Chanterelle-Mushroom-Recipes#recipe32. Chanterelles and cream pair nicely in this recipe. Serve atop mixed baby greens dressed in a light balsamic-Dijon vinaigrette. Optionally sprinkle of chopped apricots as a nod to the aroma of fresh chanterelle, I didn't do this in my recipe and the flavors were still great. Budino is the Italian word for custard or pudding, but can also be in sweet, soft dish. The one below has a tendency to lean more towards savory rather than sweet with the exception of the sweetness of the cream. Budino 2 tablespoons extra-virgin olive oil 6 ounces wild golden chanterelle mushrooms, cleaned and coarsely chopped 2 teaspoons chopped fresh basil leaves 1 clove fresh garlic, minced 1/2 teaspoon salt 4 large eggs 2 cups light cream Water for water bath (see directions below) In a large skillet over medium heat, heat olive oil. Add mushrooms, basil, garlic and salt. Saute 5 minutes, stirring often. Remove from heat and allow to cool. The original recipe recommended using 6 ovenproof ramekins or custard cups, but I decided to short cut the effort and used 2 small casserole dishes as shown in the above photo. Grease the dishes and then divide mushroom mixture evenly on bottoms of ramekins or cups. Place ramekins in a baking dish large enough to hold them without touching each other. Preheat oven to 325F. In a medium mixing bowl, whisk eggs and cream until well blended. Pour slowly over mushrooms, giving each ramekin an equal amount of egg/cream mix. Heat a quart of water to boiling in a tea kettle or similar. Pour hot water around ramekins in dish until water level equals level of budino inside. Bake for 25 minutes, then check to see if budino is set in center. If not, bake for 5 to 10 minutes longer, checking every 5 minutes. Budino is done when sides are set and center moves ever so slightly when shaken gently. When done, remove from water bath and cool to room temperature on rack. Cover and refrigerate for 2 hours or up to 1 day before service. Serving instructions are listed after the recipe below. Chanterelle-Walnut Pate 2-1/2 tablespoons butter 2/3 cup wild golden chanterelle mushrooms, cleaned and sliced 1/4 cup chopped shallots 1 small clove fresh garlic, minced 1/2 cup toasted walnut pieces 1 tablespoon walnut oil 1/2 teaspoon salt 1 teaspoon orange zest In a large skillet over medium heat, melt butter. Add mushrooms, shallots and garlic. Saute 7-10 minutes, stirring often, until mix is just browning and any liquids given off have evaporated. Place walnuts, oil, salt and zest in a food processor and process until a paste has formed. Add mushroom mix when it is done and blend until almost smooth. Place in a 1-1/2 cup mold or bowl and refrigerate just until cool. Serving instructions are listed below. Salad 2 tablespoons balsamic vinegar 1/2 teaspoon Dijon mustard 1/4 cup extra-virgin olive oil 2 tablespoons finely chopped dried apricots 4 cups mixed baby salad greens 12 cocktail-size slices of assorted artisanal breads, lightly toasted In a small mixing bowl, whisk balsamic vinegar and Dijon mustard. Slowly add olive oil, whisking constantly, until dressing is creamy. At time of service, toss dressing with apricots (if used) and greens. Divide evenly on 6 serving plate. Run a knife around edges of ramekins and invert on middle of serving plate to unmold. If casserole dishes were used, invert and cut the boudin into triangles as shown below. Spread pate on toasts and place 2 toasts on each plate. Serves 6.   Water Gardens Become a Necessity in Times of Drought Although water gardens may seem like a luxury in drought-stricken central Texas, at our place they have become a reliable and critical source of water for a lot of our wildlife. Birds are particularly vulnerable to a lack of water and after only a few hours in 90+ degree temperatures without a water source, little ones like hummingbirds quickly perish. Later we saw deer licking almost non-existent morning dew off of leaves and rabbits coming right up to the house to drink out of water buckets, such boldness and desperateness was heart breaking to watch. After finding numerous birds that had obviously died from heat and thirst, we decided it was imperative to provide a water supply for our winged and four-legged friends as well as the frogs, toads and snakes whose populations have taken a huge hit with the drought and subsequent fires, such as the devastating Bastrop County fires and the impact it had on the Houston Toad. Ideas for Sustainably Building Water Gardens
One of the biggest challenges when building the water garden was to be sure to always prioritize water conservation. In addition, we wanted to create a pond that emulated a natural pond as closely as possible. Fish were introduced to help manage the mosquito population. A shallow pond covering a large area will quickly lose water. Sunny locations will obviously help accelerate the evaporation and encourage the growth of algae. Therefore, when selecting our location, we decided to go with an area that could most easily be described as a breezeway between two buildings on the property and then built a bridge over the pond. This kind of approach offers several advantages in that it is enjoyable, enhances the beauty of your property, is an asset to wildlife and yet easy to maintain. A few key elements include: 1. A very deep and narrow channel covered by the bridge provides protection for fish from predatory birds. 2. The covered roof helps cool the area and slows evaporation. 3. A shallow, shaded area with easy access from the side provides access to birds and other smaller animals. 4. Growing plants along the edge of the pond can both help shade the pond as well as provide access for lizards, geckos and similar reptiles while also helping cool the water and limit direct sunlight. River ferns, lilies and irises work well for these applications. 5. Whenever possible, plant evergreen plants, or plants that freeze back and regrown the following year are best. Deciduous trees and plants can result in a lot of additional debris in the water that may increase the amount of upkeep required by humans. 6. Locate the pond is a low area so that when it does rain any run-off can be retained. Berming can also help with this effort. 7. Incorporate water plants such as hibiscus, pickle relish and horsetails to give dragonflies and damselflies a place to rest. Be sure to include fast replenishing plants for food for fish, but also check with you county extension agent to make sure the plants you are using are not invasive and/or detrimental to natural waterways. 8. You will want some means of circulating water. Be sure to select a pump with a biofilter and a UV light to help kill algae, but it's best to keep the flow from the pump as discrete as possible. Trickle it down a small wall or make a water fountain that sprays water gently just a few inches above the water to minimize evaporation. Do you have a water garden photo or story you would like to share? Let us know. Even if it's two more days until it is officially spring, it's springtime on the farm and babies have either arrived or are on the way. What a better way to celebrate - and take a break from all that gardening and tending to animals than a quick and cute video of a couple of baby goats a week old, figuring out how their little bodies work - with a couple of "learning accessories added to their play yard. Hope you enjoy it. 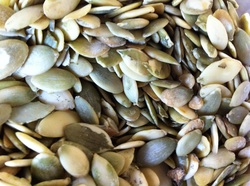 Pumpkin often appears on the list of superfoods. The nutrients in pumpkin are really world class. Extremely high in fiber and low in calories, pumpkin packs an abundance of disease-fighting nutrients, including potassium, pantothenic acid, magnesium, and vitamins C and E and omega-3 fats. The key nutrient that boosts pumpkin to the top of the superfoods list is the synergistic combination of carotenoids, chemicals with nutritive properties that exist in the pigment that colors plants and animals. Pumpkin contains one of the richest supplies of bioavailable carotenoids known.
Foods rich in carotenoids have been linked to a host of health- promoting and disease-fighting activities. They have been shown to decrease the risk of various cancers, including those of the lung, colon, bladder, cervical, breast, and skin. They have also been shown to reduce the risk of heart disease, cataracts and macular degeneration. Although that's fantastic data, it's not always easy to incorporate pumpkin into a busy person's diet. The good news is pumpkin seeds offer the same benefits, but are much more easily transportable. Just remember the raw, unsalted seeds are the healthiest for you. In addition, we first started experimenting with pumpkin seeds for the horses to improve their feet because of the magnesium. It was also the only source of magnesium and zinc we could find that we could get one of the horses to consume. Then we realized the poultry loved them. We had given them chopped up pumpkin from the garden before, but in the absence of pumpkin, your birds can enjoy the seeds and receive many of the same benefits. Now, remember to eat your pumpkin seeds! Winter brings on images of warm soups and simmering stews using winter vegetables, but what about desserts? There are lots of great egg-based recipes on the Life Slice website such as souffles and custards, but how about some quick and easy comfort food? We were inspired by a recipe recently published on making your own homemade hazelnut spread and thought we'd try different pairings with crepes, pancakes and waffles. General opinion was although it went well with just about everything, a favorite pairing was with the waffles because of their texture, so it was this week's blog entry winner. We hope you enjoy it as much as we did. Creamy Chocolate Hazelnut Spread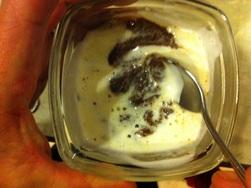
Quick and Easy WafflesBecause of the higher density of the hazel nut spread, a waffle that can stand up the greater weight is beneficial. The waffle we found that best meets these requirements is the waffle recipe from Mark Bittman's How to Cook Everything. Optional: Add in up to one cup of dried blueberries to incorporate in a superfood.
PlatingServe immediately or keep warm for a few minutes on an ovenproof plate placed in a 200 degree oven. Plate the waffles and apply a smear of hazelnut spread to each waffle.
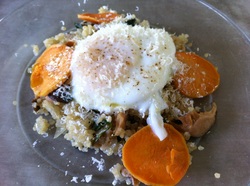 The new year seems to be frequently accompanied by the desire to be more healthy. At the same time, January seems to elicit complaints from people not only about gaining weight over the holidays, but that they also feel blotted and sluggish. Weight loss advertisements are everywhere, but how about some simple, green ways of getting healthy without ordering pre-measured meals that aren't very planet friendly. Depending on the time of year, you may be able to harvest many of the ingredients from your garden. Below is one baseline recipe to get you started, but feel free to mix and match foods according to your own tastes and preferences. The sweet potato is baked in olive oil until crispy and then added to the salad afterwards for additional texture and flavor. The recipe serves four. Quinoa and Spinach Salad with Sweet Potato Chips
Now that the winter season is finally sending some cold weather across the US, snuggling in warm beds and in front of crackling fires are heart-warming images. Add in that we're now in the midst of holiday season, it's difficult to keep busy minds and tired, over-worked bodies from wistfully wishing for the ability to snuggle in for a long winter's nap. Making a warm, snuggly bed is also a great way to conserve energy as it allows you to keep your house and bedroom temperatures lower than a less well insulated bed. Getting a good night's sleep is essential to your health, so over the years, I've read many articles about how to assemble a cozy bed fit for many hours of splendid slumber, but I've always found a few - or more - flaws. Frequently the primary flaw was in the financial aspect - although top quality linens from Italy are certainly lovely, they aren't suitable for every budget - and even more so for every household that may contain pets, kids and other adults who may not always engage in the most desirable linen conservation practices. Another complication is in the south - and now with global climate change - it's not atypical to have local weather conditions change unseasonably in a matter of hours. The practice of taking down and putting up heavy linens depending upon the season now seems to be replaced with the need for many lighter options that can easily be layered - and removed - which also breathe well. So, what did I find to be an affordable solution that met the above requirements? What I call the "superbed", a bed of wonderful comfort and coziness that will keep you warm when you need it and with easily removable layers and breathability for when you don't. The photo below shows a sample compilation of materials that work well together.  First, we'll look at the basic components that comprise a typical bed and what to look for when selecting products. Then, we'll conclude with our findings on what comprised some of our favorite superbeds.
1. Mattress. Despite the commercials regarding what you may or may not need, mattresses are a personal choice both in terms of firmness and the size of the mattress you wish to purchase, as long as your residence is able to accommodate the dimensions. Find one that is suitable to your tastes and your budget and build from there. Wear comfortable clothes when shopping for your mattress and try them out. However, since most mattresses last at least 20 years, buy the best you can afford unless you plan for an upgrade in the near future. There are a couple of things you will want to check regarding quality. a. Check the coil count. Coil construction and quality varies from company to company, but coils should start at 300 for a full, 375 for a queen and 450 for a king. Ask about the diameter of the coils. The wider, the sturdier. b. Read labels to see what the ticking is made of. Quality ticking will be a cotton blend, viscose or damask, but cheap ticking can also be a synthetic such as polyester or even vinyl. c. If you are purchasing a traditional mattress and box spring, purchase the two together because they act as a unit. 2. Pillows. There are three basic decisions regarding pillows: firmness, size and the preferred fill content. How do you fall asleep most often? Side sleepers need a firm pillow, back sleepers need a medium pillow and stomach sleepers need a thiner, softer pillow. Memory foam pillows molds to the shape of your head and neck for great support and cushioining. A pillow filled with synthetic fiber also cushions and is a great option for peole with allergies. FIRMNESS: Firmness and fill content are somewhat interrelated. To determine the firmness you desire, you can use your hand to press on the pillow, but this is not an accurate measure of what it is like to actually sleep on the pillows. Ideally you want the ability to take your pillows home and try them. If you find them unsuitable to your liking, return them. SIZING: Pillows are offered in regular, standard or full which are all approximately the same size. Next are queen and king pillows, generally proportioned to accommodate the equivalent size of bed. Lastly are jumbo pillows and full body pillows. Whatever size you buy, make sure that it fits your bed and that there is room for you on the bed as well. FILL: Fill content choices include fiber, foam or a natural fill such as feathers, down, cotton or wool. If you suffer from allergies or neck pain, many find man-made materials such as fiber or foam materials more comfortable. There are allergy-barrier pillows available and if you have asthma or allergies, you may want to consider buying this type of pillow. They block mold spores, pet dander, pollen and dust mites that can collect on your pillow, all of which can affect asthma or allergies. Many of these pillows are offered in memory foam material which are often a preferred choice by those suffering from neck pain. For others that prefer a more malleable pillow, down makes an excellent choice. The selections of all types are varied, so look at price points relative to the quality of the materials being used. If you are considering a feather pillow, the quills of the pillow can poke through the fabric covers, so consider one that is a mix of down and feathers or use a "double filled" pillow that uses feathers for a more solid core, but down for the outer core that provides softness. THREAD COUNT: Although one thinks of thread count as it pertains to sheets, the quality of the fabric covering your pillows is also important. It will both contribute to how the pillow feels as well as help contain the fill. In the case of down and fine feathers, lower quality cases may allow the contents to eventually escape, leaving you with flatter pillows and a bedroom full of fine down. Double filled pillows also frequently help contain fill contents to their proper home. 3. Mattress pads/covers. A good mattress protector encases the entire mattress to protect you against all types of microscopic particles including mites and bedbugs as well as spills. A mattress topper provides a comfortable layer between you and your mattress. The foundation should be plush, yet firm to one's preference. It's not reasonable for everyone to purchase a top-of-the-line mattress with all the latest custom adjustments, but getting a plush mattress cover will help make your mattress more comfortable while preserving your investment in your mattress. It also provides health benefits such as providing a base to conform to your body without introducing uncomfortable pressure points. Similar to pillows, there are several choices of materials available. For allergies: Select a mattress pad made of anti-microbial cotton if you have allergies. These mattress pads typically have tightly woven fabric that acts as a barrier between you, dust mites and other allergens in your mattress. A more straightforward way of staying warm is to select a heated mattress pad to warm up your bed during the colder months, but they can be cumbersome and may not offer many adjustment features. High-density foam can change the feel of your bed entirely. Memory foam and latex foam mattress pads conform to the body's contours to relieve pressure points. They're the ideal solution for the fitful sleeper. If you have back problems, testing out a memory foam mattress pad is the cheapest way to ensure your muscles will be supported -- allowing you to have a good night's sleep Maximize comfort: A mattress pad with a bit of "rise" will provide a little more cushy comfort at night. Pillow-top mattress pads add uniform padding to your mattress. Down-filled mattress toppers, which rest on top of your bed like a large, flat pillow, provide supreme softness, but be sure to have sheets handy that can accommodate the extra height. 4. Bed Sheets. This is your flat or fitted sheet over your mattress, cover sheet and pillow cases. Ideally go with a natural fabric such as cotton or bamboo as you will have better breathability Here again though, a higher quality mixed blend of man-made and natural fibers may offer better performance than a lower end cotton or bamboo sheet. Be sure to check labels carefully regarding fabric composition and be careful when looking at thread counts. FABRIC Cotton is by far the most popular fabric for sheets. Because of their long fibers (also known as staples), the highest quality cotton varieties are Sea Island cotton, grown off the east coast of the United States; Egyptian cotton, grown in Egypt; and Pima cotton, grown in the U.S. (named after the Pima Indians). Check labels carefully: Even if the products are made with just a small percentage of these high-quality fibers, they can be identified as Egyptian, Pima or Sea Island cotton. Look for a high percentage; Supima Cotton is a trademark that indicates the fibers are 100 percent Pima cotton. Bamboo is popular because its naturally resistant to bacteria and are able to wick away moisture. Beech sheets comes from beech trees grown on sustainable farms specifically for their fiber, which is often marketed under brand names such as Tencel. Both bamboo and beech can be blended with cotton for increased durability. THREAD COUNT: Higher thread count isn't always necessarily better. What is important is the length of the fiber being used and the ply, or number of threads wrapped together, as well as fiber choice makes a difference, too. Bamboo and beech sheets, for example, often have a lower thread count because the fibers are naturally softer and silkier. Also softer sheets with a high thread count, such as sateens, which are very light and thin, might not be as durable as sheets in other weaves and thread counts. Lastly, be sure to check the size and shape for proper fitting so sheets don't annoyingly bunch, bag or slip off while sleeping and check the country of manufacture. European and US made linens, all else being equal, typically have a longer life span than those manufactured in India or China, but there is frequently a higher price to pay as well. 5. Blankets. In general natural fiber blankets offer better breathability and durability, and most people find them more comfortable. Choices include cotton, wool and down. Because we are focused on layering blankets, it is recommended the first layer blanket after the bed sheets be either wool or cotton. Other choices include acrylic velour types which are often desirable for allergy sufferers and fleece blankets, typically made from acrylic fibers. The other consideration depending on your preference and climate is the weave of the blanket. THERMAL blankets are loosely woven, which allows air to circulate. This will provide less warmth, since body heat escapes, and will more typically be used by someone considered a "warmer sleeper", or during the warmer weather. Thermal is generally made of acrylic or cotton fibers. CONVENTIONAL blankets are tightly woven, making it best used for warmth and insulation. This weave traps air beneath the blanket against the body, and is generally made of synthetic or wool fibers. After extensive testing, the first level blanket that performed the best was a thermal cotton blanket. The velour nylon ones didn't offer the often desirable feeling of "weight" without necessarily adding a lot of heat. 6. Comforters: For the next layer of blankets, the down comforter performed best for cold weather conditions. Again, as with all the bedding previously discussed, your comforter selection is largely dependent on individual preferences. This is where you will need to determine the amount of fill you desire in your comforter. FILL describes the quality and different grades of goose down. For examples, a 750 fill is composed of larger down clusters than a 650 fill and will fill more space with the same amount of weight and therefore be warmer. The other number of look at is the weight of the comforter to help you make accurate comparisons. For example, compare a 46 ounce 650 fill to a 750 fill. Ideally look in the stores and feel the difference with your hands to get an idea of the real feel. For most people, a good choice for a year around down comforter would be a summer warmth for average to warm sleepers, or the autumn weight for average to cold sleepers. Be sure to consider what is the average temperature of your bedroom during sleeping hours. Cold sleepers generally select a 750 or 800 fill power while warm sleepers typically select a 650 or 750 fill. THREAD COUNT: Thread count represents the number of threads per square inch of fabric. Select down comforters will have a quality fabric with a high thread count. The higher thread count provides softness, durability and will keep the fill from getting out and impurities from getting in. BAFFLE BOX CONSTRUCTION: Baffling is a type of construction, specifically vertically sewn in cloth walls to keep the down from shifting and clumping. Without baffling you'll have cold spots resulting from shifting down not being evenly distributed. Not all down comforters are constructed with baffling, so look for this feature. The more baffling, the better. DUVET COVERS: Duvet covers can be used to cover any blanket or comforter, but they are highly recommended for down comforters. Duvets are similar to pillowcases in that they to protect and decorate your comforter. Here again, consider fabric composition and thread count. Synthetic fill comforters may offer a good choice for people who suffer from allergies. 7. Other accessories. Other accessories include throw blankets, pillows and any other item that seems to you that it will work well. Building the superbed. After multiple testing combinations in both home and third party research at accommodations such as B&Bs, hotels and inns, one of the most commonly preferred combinations was a good quality cotton or bamboo/cotton sheet with a thermal cotton or wool blanket and high quality down comforter with a high thread count duvet. However, for home environments, you can also play around with combinations of various pillow sizes and throws. Adding in a layer of sheepskin between two down comforters and adding in throws such as alpaca and cotton provide numerous combinations. Winter means different things to different people depending upon their geography. However, even in the deep south, cold fronts - sometimes earlier or more intense than anticipated - can unexpectedly freeze unprotected pipes or cause a deluge of rainfall to be lost when trying to collect rainwater because of gutters full of leaves. So, be sure to take a few minutes and walk through your property to see what might need attention. Items to take a look at include:
This may sound pompous, but it's not. It's not the dense, decadent, New York style cheesecake that comes to mind for many of us, but rather a much lighter, airier cheesecake. Think of this cheesecake as a "whisper" compared to other cheesecakes' "shouting" presence. A whisper that's more than worthy of attention. The basic recipe is from Rick Bayless Authentic Mexican cookbook. I've experimented with it on multiple strategically selected diverse subjects, and the response is always a resounding "Do you have another piece available?". However, there are two key deviations from Rick's recipe:
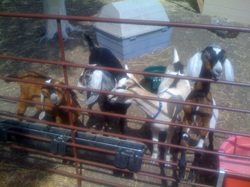
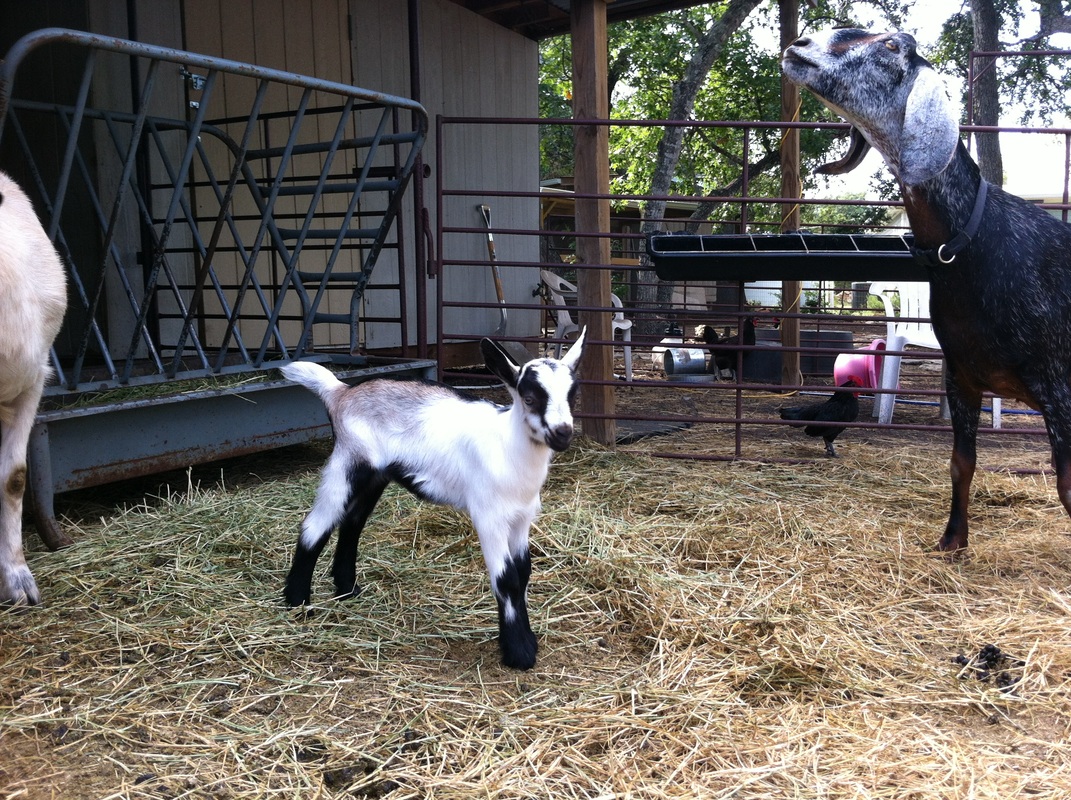
This summer we had twin baby girl goats decide they wanted to join the world in time to celebrate the fourth of July. Usually all of our kid raising is much farther along by this time of year, but the does' breeding was not successful on the first attempt and so on a cold day in February we found her amendable to another date. Fast forward five months and we arrived home one recent evening to the two little girls already cleaned up and ready to meet the world. They are just over a week now and busy exploring their world, a part of which includes learning how to drink milk from a bottle. There are additional details on the Life Slice website about how to bottle feed a baby goat. Also included is a video on the page, or you can also access it on the Life Slice You Tube channel. However, in the meantime, I'd like to share some photos of Cleo wishing she had hands. Happy Friday!
 Really need to check out getting some hands. Ideally everyone wants to reduce the amount of chemicals ingested through our daily diet, but there are so many factors to consider:
So, what is the best course of action for a consumer? If possible, grow your own fruits and vegetables. Fruits are sometimes a bit more complicated because they may require more space - trees or larger plots of land for melons to crawl across or up. Also, fruits can be very thirsty. Unless you have no concerns of water usage, it may be preferably for you to purchase organic products in the store. However, if you would like to try growing your own orchard or melon patch, it's very gratifying. Vegetables and herbs are often easier. Crops such as beans, smaller hot peppers like jalapeno and serrano, tomatillos and okra are typically low water consumers and can tolerate hotter temperatures. Cucumbers need a lot of water and cooler temperatures. Plan your diet around your climate as well as what you like to eat. Although there are seeds and plants available that are resistant to disease, they often don't taste very good. Your best bet is to go with heirloom varietals that will grow well in your. The seeds may cost a little more, but you can collect and save the seeds from your mature crops and then plant them again the following season. Step and repeat and you will save a lot of money in the long run on seeds. Proper soil preparation and organically feeding the plans will save you a lot in effort, time and additional money that you would otherwise spend on pesticides and herbicides. A healthy plant is much more capable of fending for itself than a weak one. In our household, tomatoes and tomatillos are frequently in recipes used and tomatoes are generally one of the higher ranked produce when it comes to residual pesticides, so we always prefer to grow our own. Tomatoes provide a great base for a salad caprese, stuffed tomatoes, pizza sauce or sauces for pastas among a myriad of other dishes.
If you are fortunate enough to be able to grow tomatoes in abundance, can them. Not only will you have tomatoes for a future time, but you can save money by having to buy fresh or canned tomatoes at the store, skip the potential BPA exposure from canned products and help preserve the environment by purchasing fewer pre-packaged products. There is an abundance of sites that offer instructions on canning tomatoes, so you can either start with this this link or search on your own till you find one that strikes your fancy.
With the onset of June many areas begin to experience the stress of summer heat. The heat stresses gardens and animals, so a few preparations now will save panicking later in the summer. 1. Ensure animals have an abundant and consistent supply of water. Allowing your animals to go for even short periods of time without access to water not only causes them to stress as a least worst case scenario, it will impact egg production, milk productions and growth rates. Automatic waterers/drinkers are a huge help, but be sure to check them frequently. Small ones, such as those used for poultry, can be easily bumped and accidentally turned off. In addition, malfunctions do occur. Be sure to dump out and clean the drinking fountains frequently, as the heat of summer promotes algae growth as well as minimize mosquito larvae. A scrub brush kept at various water stations will help ease the task. Check pipes, hoses, connections and floats to ensure proper operation. Larger waterers such as those for goats should be dumped and scrubbed frequently. Toilet bowl brushes work great for this. The use of barley straw in burlap bags works well to control algae. Commercially known as Stock Tank Secret, they are safe for livestock and fish and you can either make your own or they can be purchased at local feed stores for about $5. It lasts about 2 months. If you start with a dirty trough, it looks worse before it starts to clear, but eventually the algae is gone. One bag can process up to a 200 gal trough. However, other problems such as mosquito larva and tadpoles will still need to be addressed, so it's almost impossible to eliminate changing the water altogether. 2. Electrolytes and minerals are always important, but even more so during hotter months. As the temperatures rise, so does an animal's susceptibility to heat exhaustion. Livestock that is trembling, breathing rapidly and shallowly and has a rising body temperature, it is likely the victim of heat exhaustion. Provide plenty of clean, cool, clear water; shade, minerals and electrolytes. 3. Chickens are particularly susceptible to heat stress. Make sure in addition to water, birds have plenty of covered areas out of the soon with good air ventilation. Birds standing with their wings raised and panting are trying to dissipate heat. This is the first sign of heat stress. Humidity is also a large contributing factor to heat stress. Mounting fans outside the cage and using water misters will help to keep birds cool. 4. Use shade cloths to shield the garden during peak summer months. If your garden is in a sunny area with no shade during multiple hours of the day with direct sun, a UV filter shade cloth hung over the garden will help alleviate plants' heat stress as well as prevent soil moisture from evaporating as rapidly. Be sure to check irrigation systems frequently along the lines and at drip and sprinkler locations. One fault in the line can result in multiple plants being damaged.  A UV filter shade cloth significantly extends the garden's months of productivity by reducing plant heat stress and helping retain ground moisture.
When you have completed the task, the nubs will appear as in the photo on the left. The burned nubs will eventually scab over and come off or get removed of as any normal scab would. When the scabs come off, there may be a bit of bleeding, but this is not of significant concern. If you are worried, iodine may be applied to help keep the area clean and free of infection.
Happy springtime!
This time of year many chicken owners, both seasoned and new ,are enjoying their springtime chickens. While adorable, they do need some care. In addition, your chicks aren't the only babies in the area. Predators also have babies to feed and will be particularly aggressive about trying to score a meal. Take special precautions for all your poultry. To help make the best use of your time, we've recorded our topic priorities on the May Chicken Checklist. 1. Buying poultry: If you want to supplement your flock by purchasing chicks, be sure to investigate which chicken breeds work best for your climate. Mixing various breeds of chickens is not typically recommended because of the different temperaments of the breeds. More aggressive breeds will pick on more docile chickens - potentially to the point of killing them. 2. Baby birds: Ensure plenty of supplies are on hand for the arrival of babies. Extra drinking fountains for baby birds and extra feed dishes are helpful and always make sure there are plenty of extra heat lamps on hand. It seems there must be a rule that heat lamps will only fail when you are experiencing the cooler evenings of the season. Chicks consume a lot of feed for their size, so always be sure to have plenty of chick starter on hand. If you are incubating or allowing broody hens to hatch eggs, you may find the babies come in batches and they can't all go into the same baby housing together because older birds can trample younger ones. Baby birds must diligently be house according to size to prevent injuries, stress and loss. 3. Be diligent about checking drinking water. As the temperatures climb, birds will be drinking much more water. Also, any drinking fountains placed in direct sunlight will quickly grow algae. 4. It may be time to temporarily contain free ranging birds: Owls and hawks are very aggressive in spring. Poultry allowed to roost at night faces a highly increased risk of becoming an owls dinner. Keeping a close eye on your flock and monitoring your environment is critical. Once a predatory bird finds an easy meal, they will return repeatedly, so don't layout the welcome mat. Put your coop to good use. Inspect your coop fencing to make sure it is secure from top to bottom. 5. Inspect feed storage containers: Not only are your domesticated animals having babies, so are your undomesticated one. Rodents such as squirrels, rats and possums all have babies to feed and are now particularly aggressive about finding whatever food they can. Be sure your storage containers are in good condition and securely sealed when not being undesirably accessed. |
Loading
MissionOur blog is dedicated to bringing you current information on sustainable, healthy living.  Categories
All
|
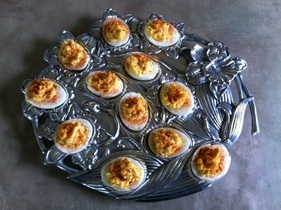


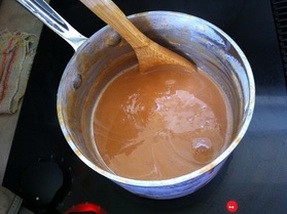


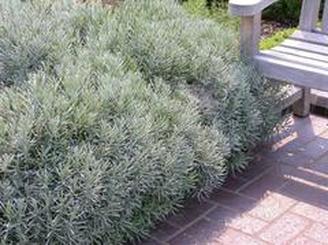
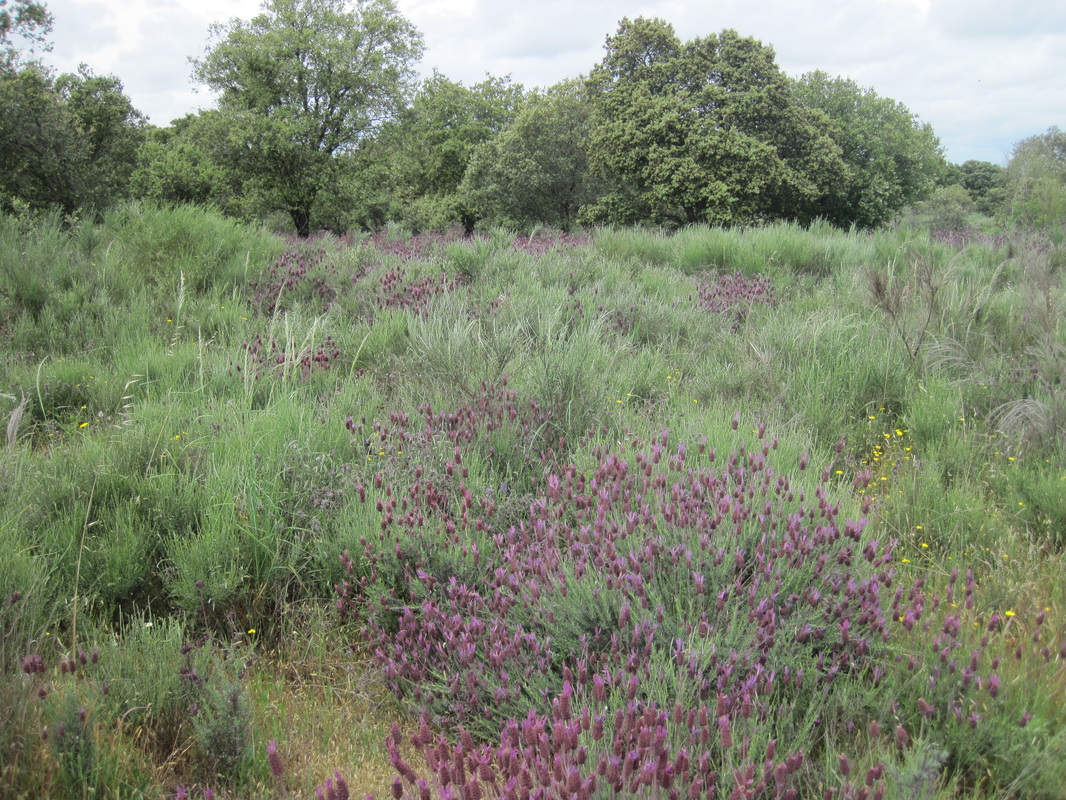


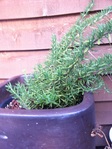


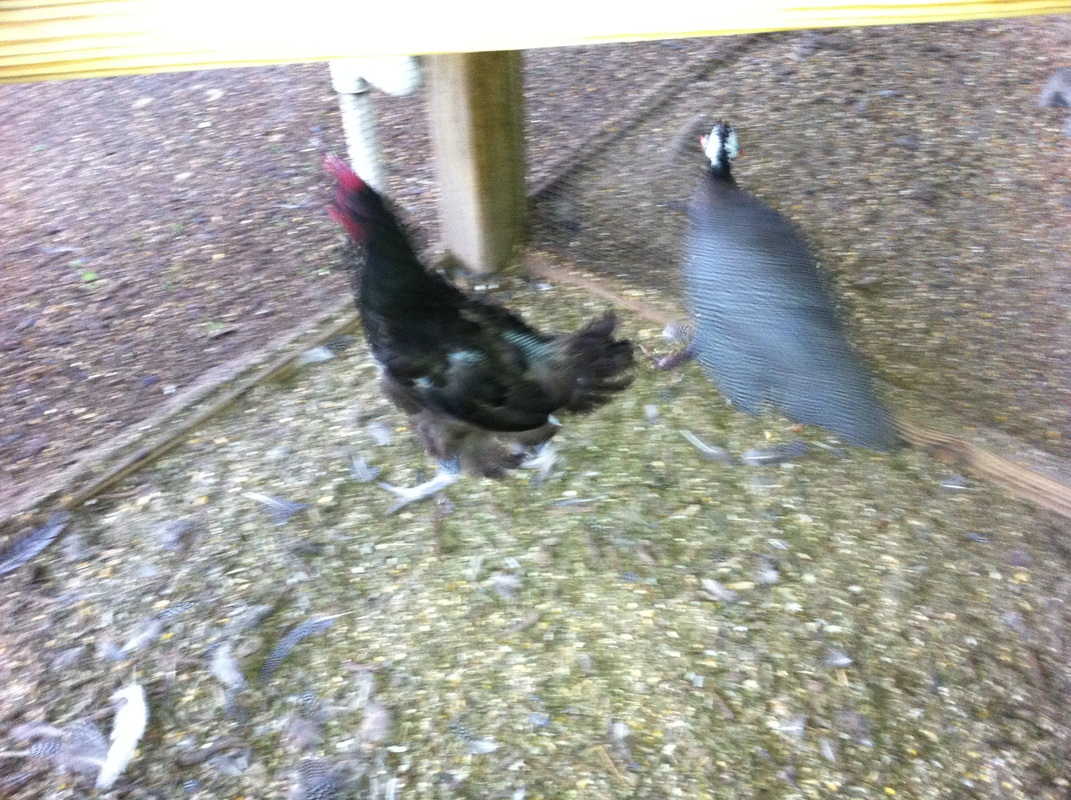
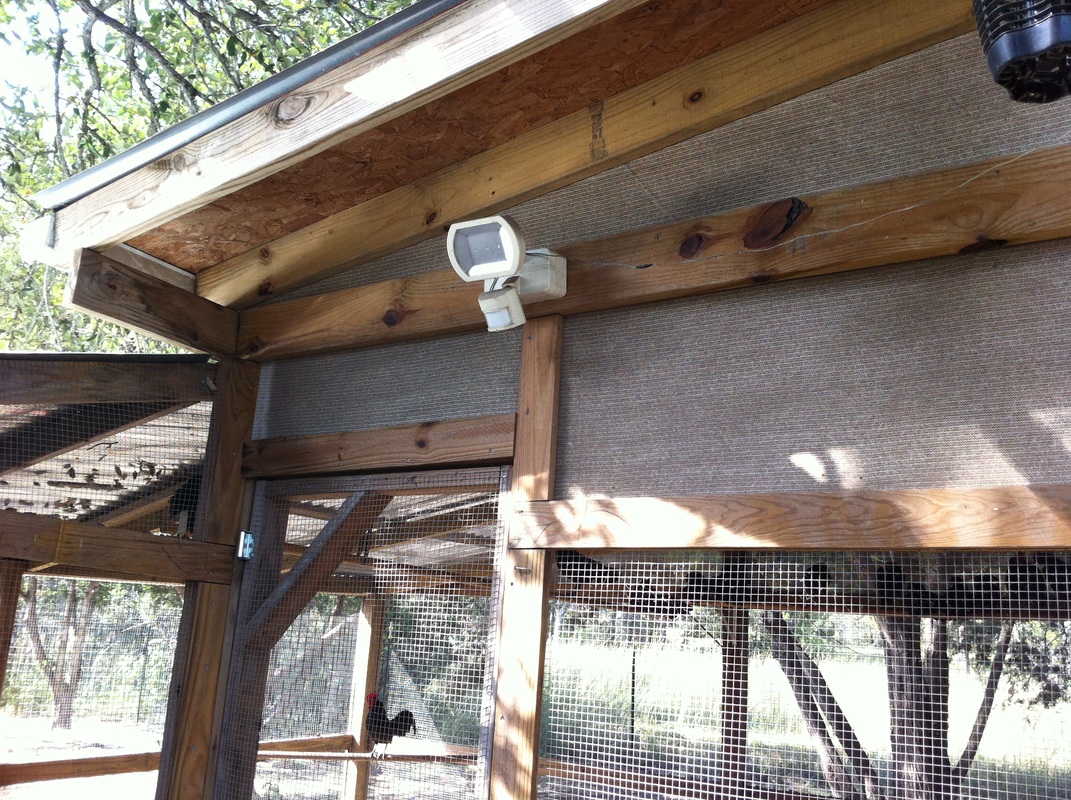
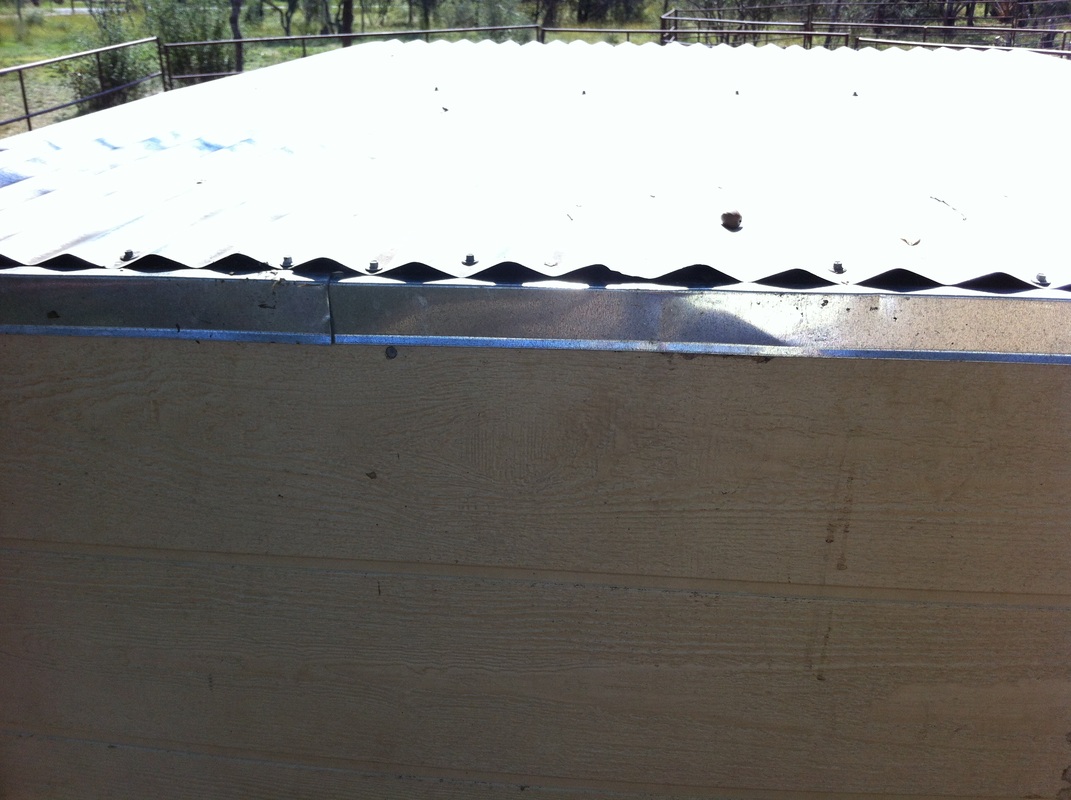

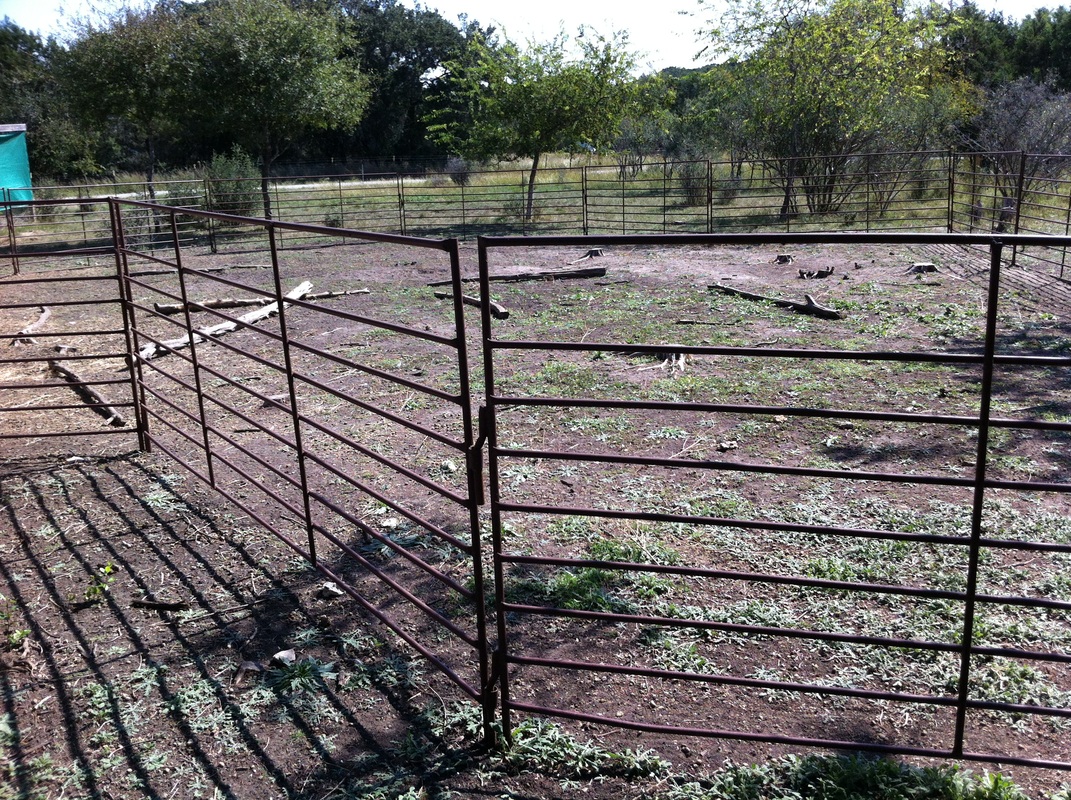

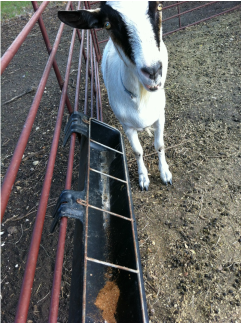

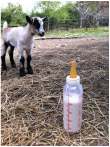
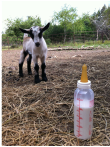
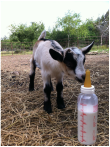
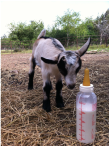
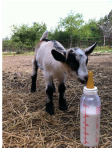
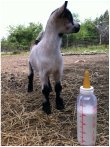
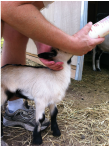
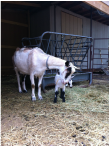
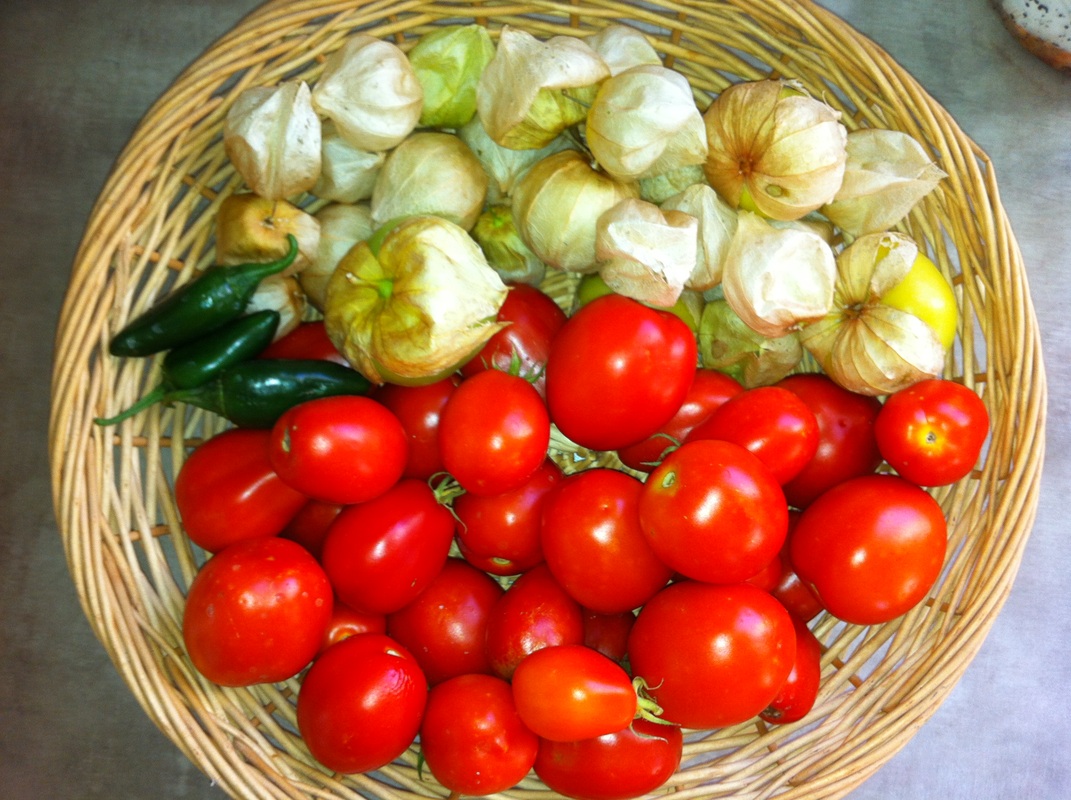


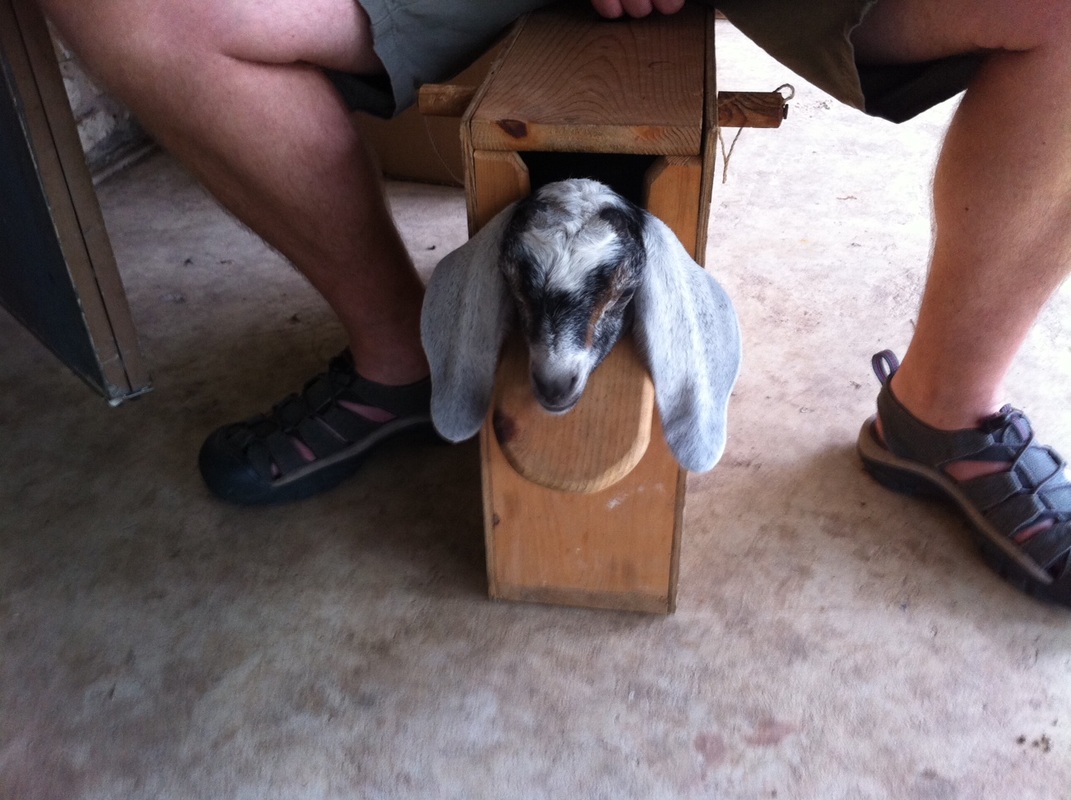
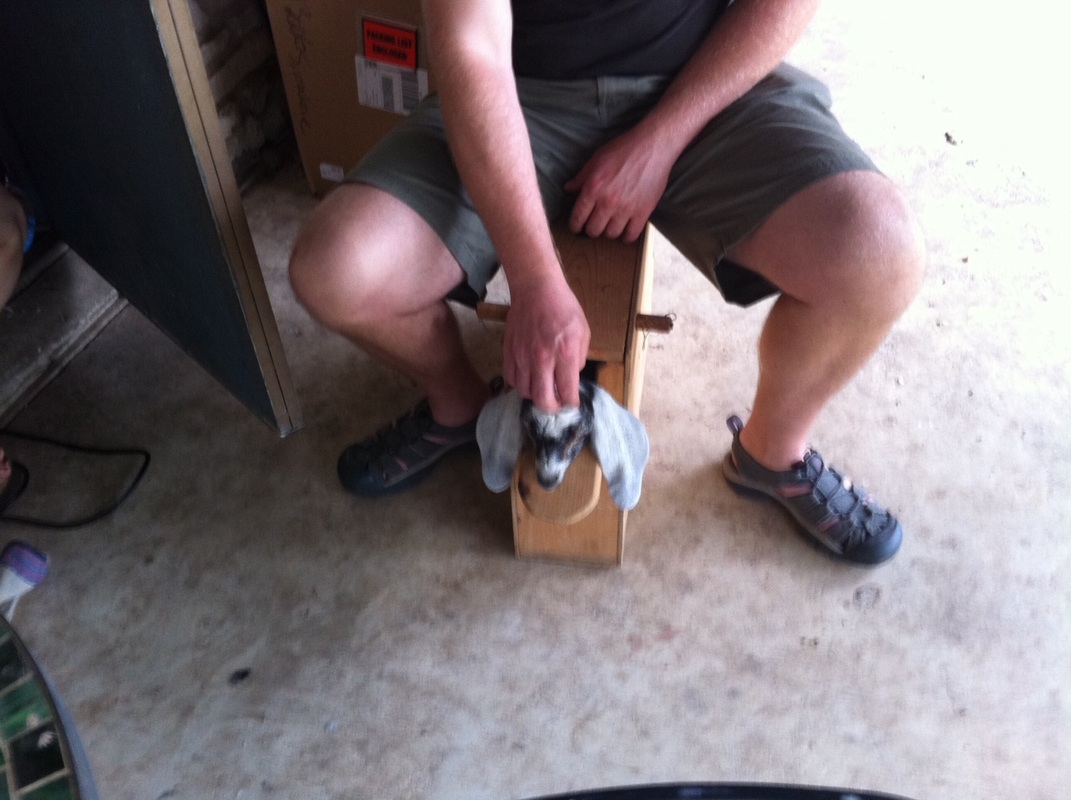

 RSS Feed
