How to Start a Garden
Loading
Gardening Basics
Taking time to get the fundamentals rights will save you money later
It is not uncommon for first time gardeners to have "beginner's luck". The soil is fresh and undepleted. Many pests, fungi, etc will not necessarily find the garden in its first year. In the first year, the gardener also does not need to worry about soil and crop rotation. Then the second year the gardener is sadly disappointed when the experience is one of plants struggling with diseases, pests and general poor production. Although this is not always the scenario, it more than often is, so take time to plan your garden correctly and enjoy years of plentiful harvests.
How to Determine Site Selection
|
Your garden site selection is one of the most important decisions you will make for your garden.
|
Raised Planting Beds
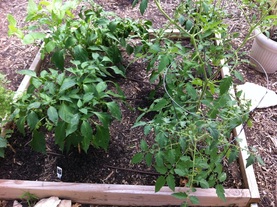
If your yields are disappointing, your garden space isn’t as productive as you’d like, or if you only have a small space to devote to gardening, building a raised bed may be your answer. Raised beds are easy to build and allow you to artificially provide substantially more topsoil, which will help plants to thrive and flourish, as well as providing improved drainage. However, raised beds can consume more water than planting directly into the earth, so use an efficient irrigation system in combination with this method.
Raised bed advantages include
Raised bed advantages include
- Raised beds warm more quickly in spring, allowing you to work the soil and plant earlier.
- Raised beds drain better.
- The soil in raised beds doesn't get compacted, because they are constructed with accessibility in mind and you don't walk on your growing areas.
- It's easy to tailor the soil for your raised bed to the plants you plan to grow there.
- After the initial construction process, raised beds require less maintenance than conventional garden beds.
How to create a garden
1. Layout your garden for optimal usage
|
2. Site preparation
- Before beginning digging, you may want to snuff out the grass - if needed - by placing boards, heavy tarps on anchored newspapers on the site to help kill off the existing surface plants.
- To ensure that your plant's roots have plenty of room to grow dig out the existing sod and loosen the soil with a shovel or garden fork to a depth of eight to twelve inches. This will give your plants the 6" from the board height plus an additional 8 to 12 inches so plants' roots can go deeply and firmly into the ground.
3. Building raised planting boxes
|
4. Pathways
- Do not neglect the importance of pathways in your design. A minimum width of 18 inches is recommended to easily move between the boxes.
- Plants like tomatoes will grow large and aren't always respectful of box boundaries, even with cages and staking.
- You want to have the ability to bring a wheel barrow and/or other larger tools in and out of the garden for composting, amending soil and mulching. See how much room you think you will need and plan accordingly.
- Dig up the areas where they pathways will be to remove weeds, grasses and larger rocks and remove the debris
- Put down a weed barrier such as newspaper or weed cloth
- Then lay down a heavy layer of mulch, small pebbles, or crushed granite.
5. Bed construction
Constructing:
Cut boards to the desired size, then attach them to make a simple frame. You can attach them by making a simple butt joint at each corner, pre-drilling and then screwing the corners together with galvanized screws. You can use a small piece of wood in the corner and attach each side to it.
Leveling:
After the frames are built, level them so that water does not run off from the high areas and collect in the low areas. You level frames by placing a level along the plank and ensure the boards are level. They do not have to be 100% level, but they should be as close as possible. If you have high areas in your frame, simply remove some of the soil from beneath that area of the frame.
Filling the bed:
Use the best possible soil for your beds. If you do not have any of your own home-made soil available, visit a local nursery that offers green soil products. This provides a good starter base which you can later amend with your own soil, compost and mulch to maintain and improve your beds. Add composted manure into the bottom of the bed and then layer good soil on top of the nutrient-rich compost. You can cut costs significantly by using some soil from other parts of your property, but make sure the soil you are using is productive soil. No matter how good your base is, you will still get poor results with a layer of dense clay or other poor soil on top of the compost. Plan on filling at least 1/3 of your raised bed with compost.
Make 12 inch planting squares
After the frames are constructed and in place, fill with soil. Then, measure out the boxes into 12 inch squares. Hammer nails about half ways into the board at each 12 inch mark. Then using either string or flexible wire make dividers into 12 inch squares. This will ensure that each plant is provided with adequate space to grow. If you are doing root crops like carrots, turnips, onions or potatoes, you can place more than one plant every 12 inches. For larger plants like tomatoes, consider planting these on the end of aisles or allow a neighboring square to remain empty to allow plenty of space.
6. Maintaining beds
- Each spring and/or fall, top dress with fresh compost and manure.
- If your bed only holds plants for part of the year, dig the compost or manure into the top several inches of soil.
- As with any garden, mulching the top of the soil will help retain moisture and keep weeds down, an important element for fast draining raised beds.
|
|
|


